How Much Does Trimlight Cost? Full Pricing Guide for 2026
If you have been researching permanent holiday lighting and want a straight answer on what Trimlight actually costs, this guide gives you one....
10 min read
Trimlight : 6/5/26 10:45 AM
Table of Contents
For most homeowners, the decision to move forward with permanent roofline lighting comes down to two questions: what does it look like when it is done, and what does getting there actually involve? The first question is easy to answer — a clean, even roofline that is barely visible during the day and fully customizable at night. The second question is where most homeowners want more detail before they commit.
This guide walks through the full Trimlight installation process in practical terms — what happens between scheduling and the crew leaving your driveway, what you need to do to prepare, and what the honest reality of the day looks like. If you are seriously researching permanent roofline lighting, understanding the process is the most useful thing you can do before picking up the phone.
Once you have worked with a local Trimlight dealer and confirmed your installation, the scheduling process begins. You will receive a text message or email with your pending installation date. If that date does not work, respond with alternatives as soon as possible — during busy periods the schedule fills quickly, and waiting to respond can push your installation significantly further out than the earliest available slot would have been.
One thing worth knowing upfront: installation dates can shift. Weather delays, project overruns on other jobs, and crew scheduling changes can all move a date by a few hours to a few days. If you need to reschedule after a date is confirmed, notify your dealer at least five business days in advance to avoid a rescheduling fee.
The busy season — typically late summer through the holiday months — is when scheduling flexibility matters most. Homeowners who come in earlier in the year often have more options and shorter wait times than those who reach out in October hoping for a November install. If permanent roofline lighting is something you are seriously considering, getting the conversation started with a local dealer earlier rather than later tends to produce a more convenient timeline and a broader range of available installation dates to choose from.
The single most useful thing you can do before installation day is download the Trimlight Edge app. Doing this in advance — and having your Wi-Fi credentials, Apple ID or Google account ready — streamlines the connection process on the day and means the crew can get you set up quickly rather than troubleshooting app access during the walkthrough. The app is called Trimlight Edge and is available on both the App Store and Google Play. If you have an iPad and are searching the App Store, make sure the search is set to show iPhone-only apps, as the app may not appear otherwise.
Beyond the app, the other preparation that makes a meaningful difference is clearing the perimeter of the home before the crew arrives. Any lawn decorations, outdoor furniture, seasonal items, or other belongings within the work area around the home should be moved beforehand. Trimlight installers will be careful around anything left in place, but cannot be held responsible for items that are in the way of the installation. Pets should also be secured and kept away from the work area for the duration of the install — ladders and tools are in use throughout the day, and the combination of activity and roaming animals creates unnecessary risk for both.
If your home has electrical outlets in the soffits, note whether those are critical for your needs before the crew arrives. Depending on how they were originally installed, the Trimlight channel may partially cover them after installation. Letting the installer know upfront gives them the best chance of working around those outlets — if accessibility needs to be prioritized over clean channel placement, the aesthetics in that section may be slightly affected.
Trimlight uses factory-trained technicians for every installation — people who have been specifically trained on the Trimlight system rather than general electrical or construction contractors. This matters because the quality of a permanent roofline lighting installation is almost entirely determined by the precision of the channel mounting, the accuracy of the LED placement, and the integrity of the electrical connections. General experience does not guarantee the same result that system-specific training does.
It also matters for the warranty. Trimlight backs the system with a lifetime product warranty, and that warranty is only meaningful when the installation itself was carried out correctly. Factory-trained technicians working with the right tools and following the Trimlight installation process are what that warranty is built on. Homeowners who attempt DIY roofline lighting installations or hire general contractors to replicate the system do not have the same foundation underneath their result.
There is also a consistency dimension that matters across a network of dealers and crews. Because Trimlight technicians are trained to the same process regardless of which dealer they work through, the installation experience and the quality of the finished result are consistent whether you are in a major metro area or a smaller market. The training is what standardizes the outcome, and the outcome is what the lifetime warranty is designed to stand behind.
When the crew arrives, the first order of business is assessing the property and organizing the work. This includes reviewing the roofline, identifying the most logical routing for the channel along the eaves and fascia, and determining the best path for the wiring to reach the necessary electrical connections. Tools are organized, the work area is established, and a clear sequence for the day is confirmed before any hardware goes up.
This preparation phase is what makes the rest of the day run without interruptions or mid-installation adjustments. Rooflines are not uniform, and homes present different challenges depending on architecture, existing electrical configurations, and the condition of the fascia. Taking the time to assess before starting ensures the crew has a plan that accounts for the specific conditions of each property rather than discovering complications after work has begun.
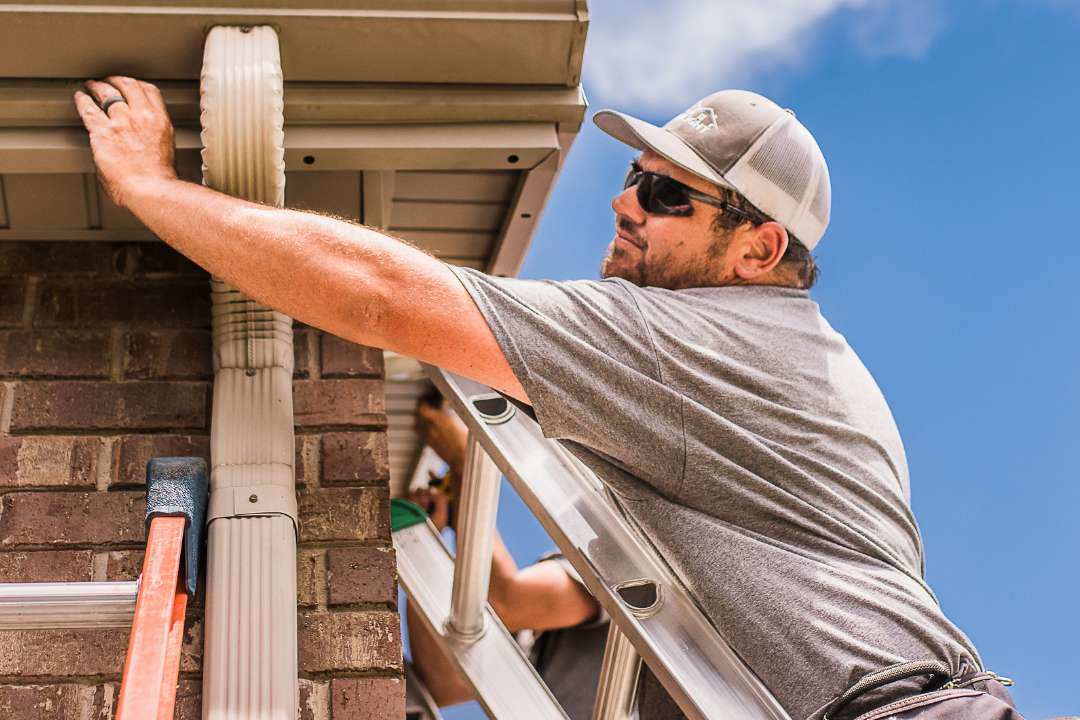
The aluminum channel is custom-cut to fit the exact dimensions of each roofline section and mounted directly along the eaves and fascia of the home. The channel is what makes the system appear invisible during the day — mounted flush with the trim, it reads as part of the architecture rather than something added to it. The precision of this step determines the quality of everything that follows. Channels that are not level, not flush, or not properly secured produce visual inconsistencies in the finished installation that cannot be corrected later by adjusting the lights.
Ladders are used extensively throughout this phase and will lean against the exterior of the home. This is a standard part of any roofline installation and is unavoidable. On most homes this causes no issues, but on properties with exterior materials in poor condition or delicate finishes, homeowners should be aware that Trimlight cannot be held liable for damage to materials that do not hold up under standard ladder contact. If you have concerns about specific areas of your exterior, flag them with the installer before work begins in those sections.
Once the channels are confirmed and secure, the LED units are seated within the channel and the electrical work begins. Each LED is individually positioned within the channel to ensure even spacing and consistent output across the full roofline. The system then connects to your home’s existing electrical setup, which eliminates the need for extension cords or outlet connections visible from the street.
The wiring path depends on what the home’s layout allows. In many cases, the installer can route wiring through the attic for a fully concealed result. In others, the most practical option is an exterior-mounted wire cover channel that runs along a gutter, downspout, or wall section. This channel is designed to blend with the exterior and is not a visible cord, but it is worth knowing that complete concealment is not always achievable depending on the home’s configuration. The installer will choose the most logical routing option available and will only deviate from that if you specifically request it — any significant additional work, such as drywall removal, is billed separately.
The control box — which links the LED system to the Trimlight Edge app — is mounted in a discreet location on the exterior as part of this phase. This is the device that receives your commands from the app and communicates them to the LED channel, and it needs a stable position with access to your home’s Wi-Fi signal to function correctly.
After the full installation is complete, the crew runs a thorough test of the system before wrapping up. This means activating the lights through the app and checking the full roofline for consistent brightness and even coverage across every section. Any LED that is not performing correctly, any section with inconsistent output, or any connection issue that shows up under load is addressed before the team considers the job done.
Testing is not a formality. It is the point in the process where installation quality is confirmed and any issues are caught while the crew and their tools are still on site. Finding a problem at this stage takes minutes to resolve. Finding the same problem a week later takes a return visit. The testing phase is what stands between a fully functional system and one that has a nagging issue the homeowner has to manage through their dealer after the fact.
When testing confirms the system is performing correctly across the full installation, the crew cleans up the work area. This includes removing tools, equipment, and packaging materials, and collecting the metal cuttings that are produced during channel fabrication. These cuttings are sharp and the crew does their best to collect all of them before leaving, but homeowners should avoid walking the installation area barefoot until they have had a chance to inspect the ground themselves — particularly around groundcover, grass, window wells, or any area where small debris could be hidden.
Once the site is cleaned, the crew conducts a final walkthrough with the homeowner. This covers how the finished roofline looks from the street, a brief demonstration of the Trimlight Edge app, and answers to any questions about operating the system day-to-day. The walkthrough is designed to leave the homeowner comfortable running the system independently from day one. If you need additional guidance after the installer has left, your Trimlight sales representative is the right contact for follow-up tutorials.
The Trimlight installation process is structured the way it is because the problems it prevents are real and consistent across DIY and general contractor approaches. Understanding what those problems look like in practice is useful context for why the factory-trained technician model matters as much as it does. Most issues fall into three categories, and each one has consequences that outlast the installation day itself.
Without specialized tools and a systematic positioning process, lights installed along a roofline tend to drift in spacing as the installation progresses. What starts evenly spaced at one corner gradually becomes inconsistent by the time the far end of the roofline is reached. From the street this reads as an amateurish result regardless of how much effort went into it. The channel system and trained technicians eliminate this by establishing and maintaining precise spacing from the start rather than attempting to correct it at the end.
This matters more than it might initially seem because inconsistent roofline lighting draws the eye to the spacing rather than the home. The visual effect that makes permanent roofline lighting so compelling in the first place — a clean, even trace of the home’s architectural outline — depends entirely on consistent coverage. An uneven installation undermines that effect and is essentially impossible to correct without redoing significant portions of the work.
Roofline lighting that is not properly wired to the home’s electrical system creates risks that go beyond a poor visual result. Overloaded circuits, connections that do not meet outdoor exposure standards, and wiring that was not installed with the right gauge or protection for the application are all potential hazards. Trimlight technicians wire to required standards, which protects both the system and the property it is installed on in a way that consumer hardware and general contractor work cannot reliably guarantee.
The outdoor environment compounds these risks significantly. Wiring and connections that might be acceptable in a sheltered indoor application can fail when subjected to temperature cycling, moisture infiltration, and UV exposure over multiple seasons. A professional installation accounts for those conditions from the start. A DIY installation often does not, and the failure mode when outdoor wiring is not up to the environment it is placed in ranges from a system that simply stops working to a genuine fire hazard.
Mounting hardware along eaves and fascia without the right tools and methods leaves marks, cracks, and holes that become visible when temporary lights are removed — which, with seasonal lighting, happens every year. Over time this cumulative damage affects the condition of the fascia and the overall appearance of the home’s exterior in ways that are disproportionate to what a lighting installation should cost the property. Trimlight’s mounting approach is designed to work with the fascia material, leaving the exterior clean.
The one honest caveat here is exterior materials in poor condition. Fascia boards that are rotted, cracked, or structurally compromised may not hold up to standard ladder contact and hardware mounting regardless of how carefully the work is done. If there are sections of the exterior in visibly poor condition, flagging them with the installer before work begins in those areas gives everyone the best chance of a clean result — and in some cases may reveal that a fascia repair should happen before the lighting installation rather than after.
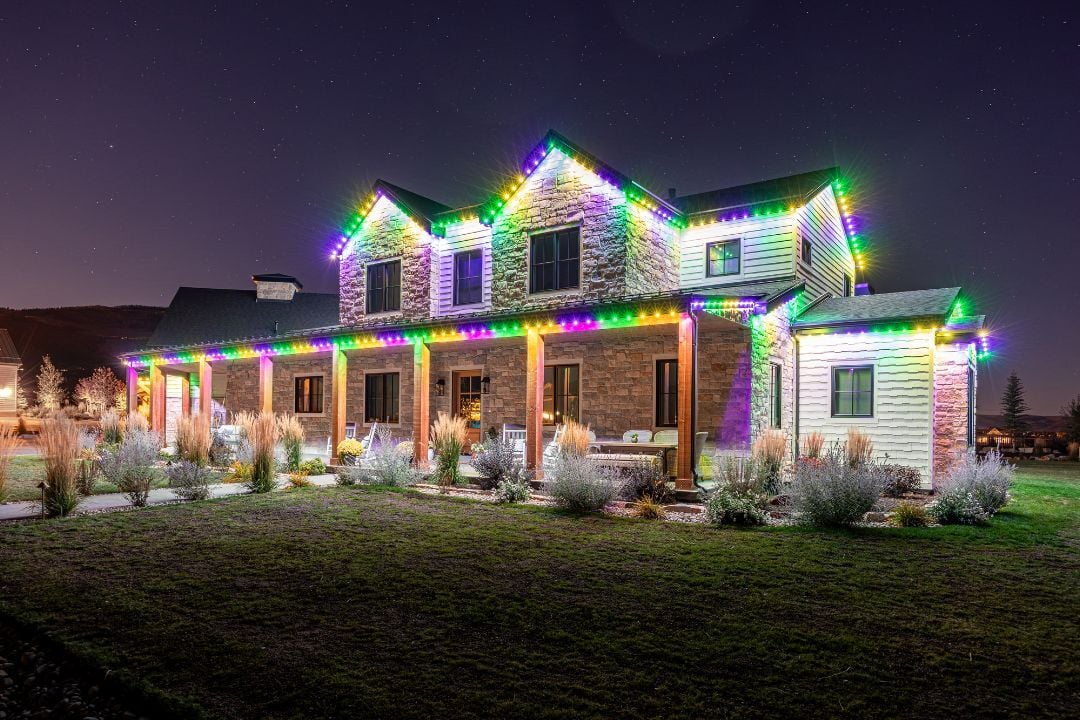
On the day of installation, most homeowners are surprised by how little the system shows during daylight hours. The channel sits flush with the fascia and reads as part of the roofline trim — visitors who were not told the lights are there rarely register the hardware until they see the system activated for the first time. The exterior looks the same as it did before the installation, minus any visible cords or outlet connections.
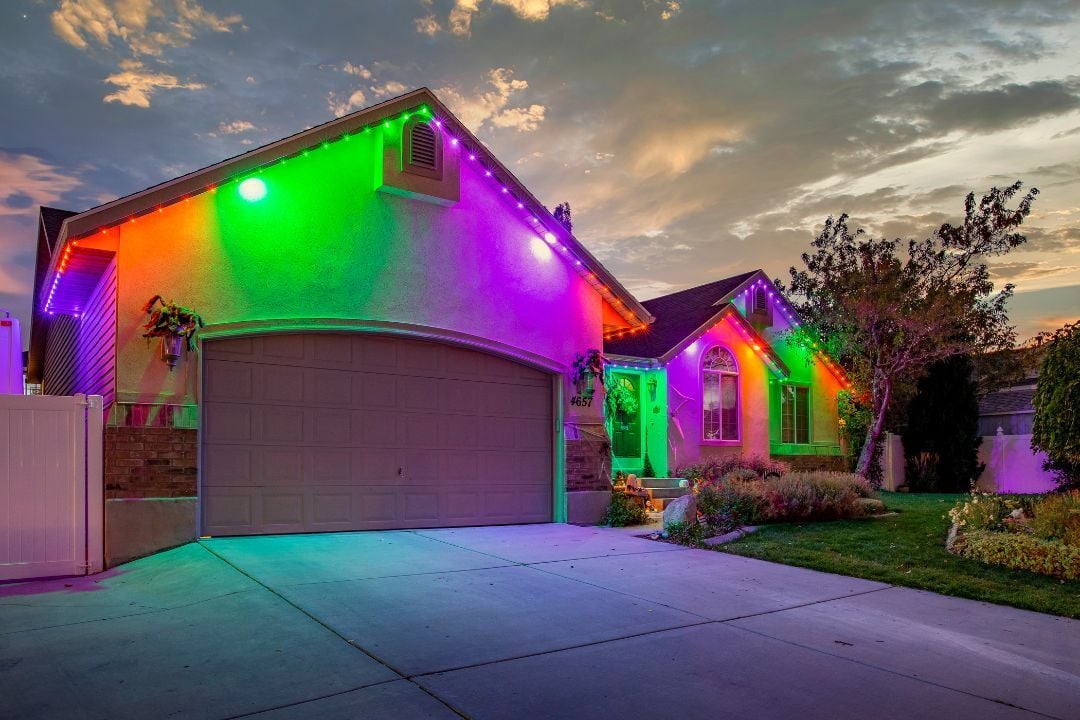
After dark is a different story. The roofline is evenly and precisely illuminated across its full length, and the quality of the output reflects commercial-grade LED hardware rather than consumer alternatives. Whether you run a warm white as your default or open the app and start exploring holiday patterns and custom color combinations, the result is immediately visible from the street as something that was designed to be there rather than clipped on for the season.
Most homeowners open the Trimlight Edge app for the first time during or right after the final walkthrough, and the combination of seeing the roofline lit for the first time and discovering how much the app can do tends to be the moment the investment makes complete sense. The system that looked appealing in product photos looks considerably better on an actual home — and it is running exactly that way from the first evening after installation, without any further setup required. From that point forward, every color, pattern, schedule, and seasonal transition happens through the app from wherever you happen to be.
Download the Trimlight Edge app and have your Wi-Fi credentials ready, move any outdoor furniture, lawn decorations, and seasonal items away from the perimeter of the home, and secure pets away from the work area for the duration of the install.
Yes — dates can shift due to weather or project delays, which is normal in exterior installation work; if you need to reschedule, notify your dealer at least five business days in advance to avoid a rescheduling charge.
While you don't necessarily need to be there for the exterior mounting, it is recommended to be available at the start to confirm the layout and at the end so the technician can walk you through the app and ensure you know how to program your new lights.
Metal cuttings from the channel fabrication fall to the ground during installation — the crew collects them before leaving, but homeowners should avoid walking the area barefoot until they have inspected the ground themselves.
Yes — extensions to additional roofline sections, covered patios, or pergolas can be scheduled through your local Trimlight dealer as a follow-up installation.
Stay connected with Trimlight. Subscribe for monthly news, product updates, and outdoor lighting inspiration.
If you have been researching permanent holiday lighting and want a straight answer on what Trimlight actually costs, this guide gives you one....
Imagine never having to untangle a mess of Christmas lights or climb a ladder in the cold again. Trimlight’s forever Christmas lights take the hassle...
Trimlight's team of factory-trained technicians are dedicated to providing you with the best possible permanent outdoor LED lighting system. With...